25/09/23
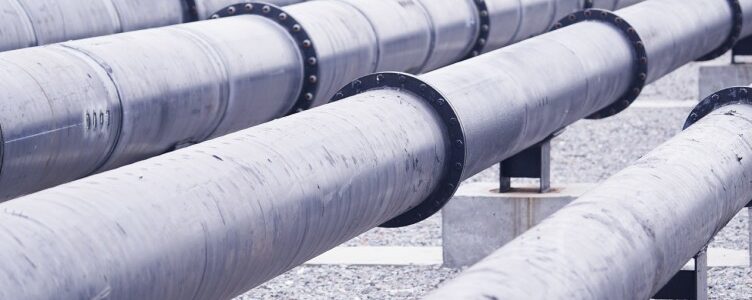
Recently, Scantech helped the Research Institute of Zhejiang Provincial Energy Group Co., Ltd, a first-class integrated energy supplier in China, to inspect gas pipelines for damages such as corrosion, mechanical damages, and cracks.
Incidents of pipeline failure can result in serious financial losses, human casualties, and ecological disasters. Gas pipeline inspection is crucial for pipeline integrity management to keep pipelines in good condition. The safety regulations require that technicians shall inspect these pipelines regularly (internal and external inspection) to ensure that they are maintained in an efficient state.
Non-destructive inspection methods, including ultrasound technologies and magnetic-flux leakage technology, help operators to test pipelines efficiently. High-tech 3D scanning is a new NDT inspection solution to inspect pipelines without compromising on safety, integrity, and accuracy.
When paired with 3D software and smart modeling algorithm, Scantech’s NDT 3D scanning solution can help pipeline operators to ensure pipeline integrity while sticking to tight budgets and timelines. This emerging solution is more efficient and accurate than traditional measurement methods.
Our comprehensive 3D solution offers fast deployment, high portability, quick set-up, accurate measurement results, non-destructive testing, versatile analysis, full-filed 3D data, and intuitive reports.

Zhejiang Provincial Energy Group Co., Ltd
The customer in this case is the Research Institute of Zhejiang Provincial Energy, a large-scale state-owned enterprise in China. The company specializes in the production of electric and heating power, investment and exploitation of coal mines, circulation businesses of coal, exploitation and utilization of natural gas, energy services, and more.
The project aims to obtain detailed and in-depth analyses of the damages by getting a complete 3D visualization of the inspected areas. The measurement and evaluation mainly focus on corrosion and denting on the external surfaces of gas pipelines, which needs to be efficient and accurate. The accuracy rate of defect measurements and defect 3D model reconstruction shall be higher than 98%.
The pipelines in this case, made in steel or PE, range from 100 mm to 1014 mm in diameter. The steel pipelines feature smooth and relatively reflective surfaces. Due to the ellipticity of pipelines, it is challenging to reconstruct the pipelines and damages on their surfaces.
Many inspection techniques have been developed to detect damages. However, few on-site measurement methods exist or are practical enough to accommodate complicated conditions and damages.
Traditionally, engineers use manual pit gauges and rulers to inspect damages. Operators measure the dimensions of the damages identified after excavation, and professionals analyze the data and run calculations to assess and evaluate the damages according to relevant regulations. However, these inefficient methods have disadvantages including inaccurate measurement results, long inspection, and inefficient damage evaluation and data management, and professional skills required.
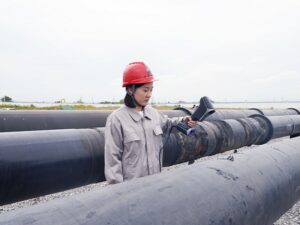
handheld 3D scanner for measuring pipelines
Inappropriate physical inspections even increase leak rates in older pipelines in certain situations. The use of sophisticated and NDT 3D inspection is essential for high-quality inspection in pipeline distribution systems.
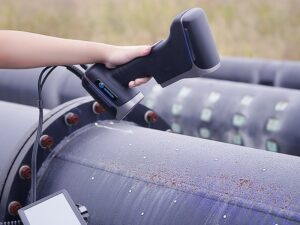
pitting corrosion detection
Engineers used Scantech’s composite 3D scanner KSCAN and smart module AirGo Power (for powering the metrology 3D scanner in the field without power supply) to inspect the damages of pipelines. It took about 20 minutes to complete the task.
By getting high-resolution and high-precision 3D data on corrosion and denting, engineers were able to generate 3D models of the damaged areas with specific values. Small features such as pitting corrosion were acquired fast.
The point clouds of the damages were processed to accurately obtain the characteristics of flaws on the external surfaces of pipelines, such as their lengths, widths, depths, and curvatures. These data help to analyze and identify the causes of damages quickly.
Engineers used the 3D data captured to develop a pipeline damage database with 3D models of damages stored for further comparison and analysis. They can later analyze the damages and predict the evolution of pipeline degradation. In this way, engineers can evaluate risks accurately, predict the residual lifetime of the pipelines, and deploy preventative measures in a timely manner.
On-site 3D Scanning for Areas Without a Power Supply
When paired with the smart module AirGo Power, KSCAN 3D laser scanner can support on-site measurement in remote areas without a power supply. It saves the trouble of connecting industrial 3D scanners to a power supply with long cables, enabling free and smooth 3D scanning.
High Accuracy and Resolution to Capture Intricate Details
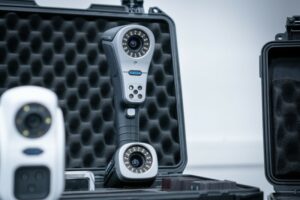
metrology 3D scanner KSCAN-Magic
KSCAN professional 3D scanner features five standard working modes including large-area scanning and fine scanning. With two sets of high-definition industrial cameras, it conducted the 3D scanning of pipelines meticulously. Its sophisticated algorithm and fine scanning suited well for capturing intricate details of minor defects. This industrial 3D laser scanner with an accuracy of up to 0.020 mm delivered high-precision measurement results for these damages.
High Efficiency
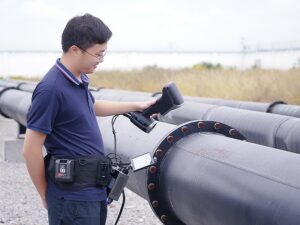
portable 3D laser scanner for corrosion detection
Due to its measurement rate of up to 1.65 million measurements per second, KSCAN enables fast surface acquisition with good scanning performance. Generally, it takes half a day to finish the measurement tasks of pipelines in the field. The measurement time was reduced to 20 minutes, which greatly increased inspection efficiency and reduced time and labor costs.
Intuitive Report
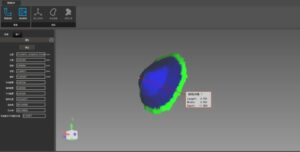
point clouds of damages
KSCAN comes with specialized and metrology-level pipeline inspection software, which can offer the actual values of length, width, depth, diameters, and areas of defects. For example, the pits are shown in different colors from light green to dark blue so engineers can intuitively view their depths.
Damage Evaluation System
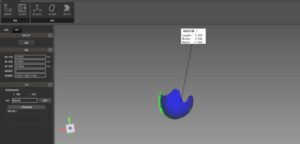
depth, width and length of pits
The data were used to create an intelligent system for evaluating damages, which helped establish a one-stop shop for damage management, evaluation, and storage. Users can access the information and characteristics of the damages through online database and generate damage reports quickly.
The Potential for More Applications
The 3D measurement system has been successfully applied in the pipeline field of Zhejiang Energy Group for pipeline inspection. The measurement results were of high accuracy and the measurement processes were efficient, which can bring remarkable benefits for manufacturers and companies in terms of time and labor costs. This solution can help reduce the time for emergency pipeline leak repair and offer a comprehensive data base for residual lifetime evaluation of pipelines.